Change all construct calls to __construct.
and also:
https://mainwp.com/notice-the-called-constructor-method-for-wp_widget-is-deprecated-since-version-4-3-0-use-__construct/
Hacks, tips, tricks and best practices for developers
Change all construct calls to __construct.
and also:
https://mainwp.com/notice-the-called-constructor-method-for-wp_widget-is-deprecated-since-version-4-3-0-use-__construct/
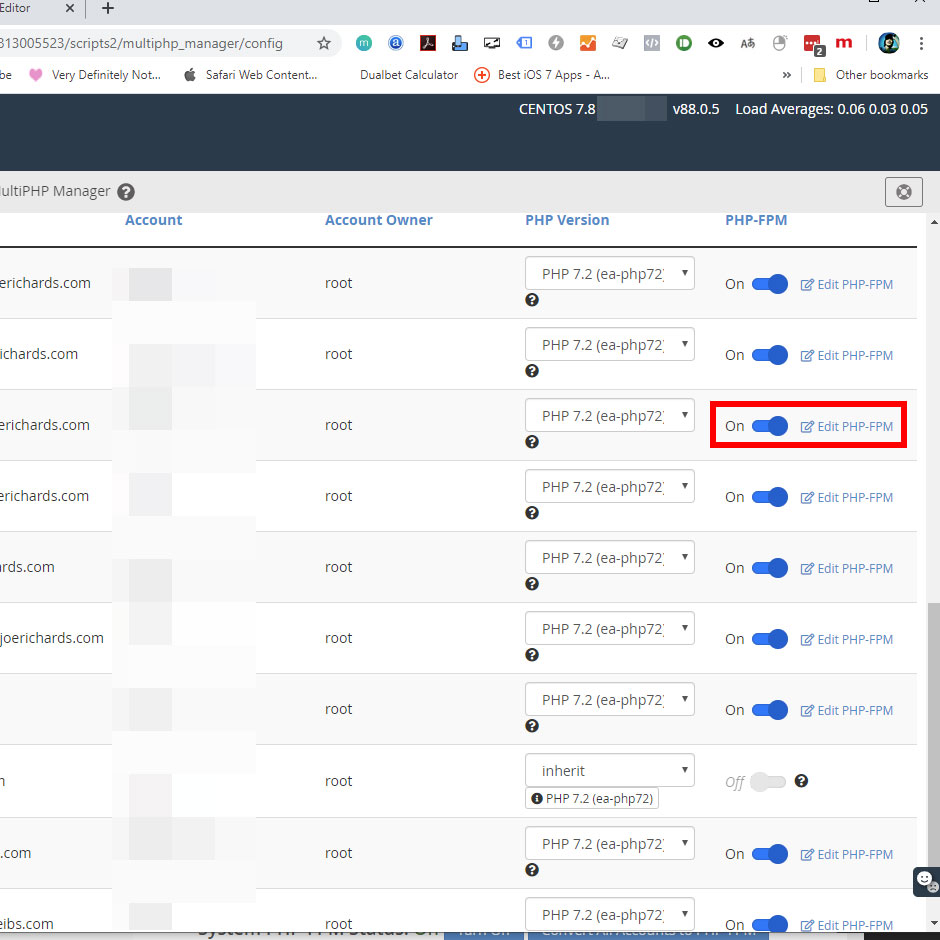
First, check to see if your PHP-FPM is running for your cPanel account.
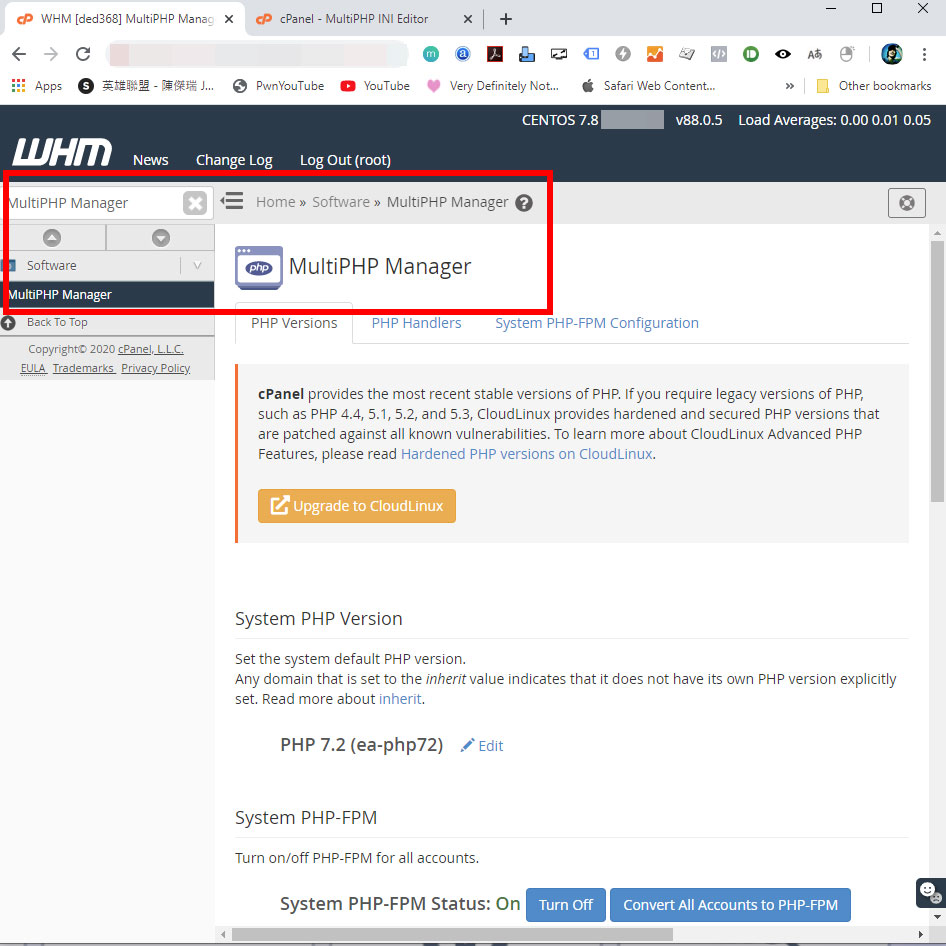
Head to WHM > MultiPHP Manager.

If it is turned on for the account, you can edit the directive by clicking on ‘Edit PHP-FPM’.

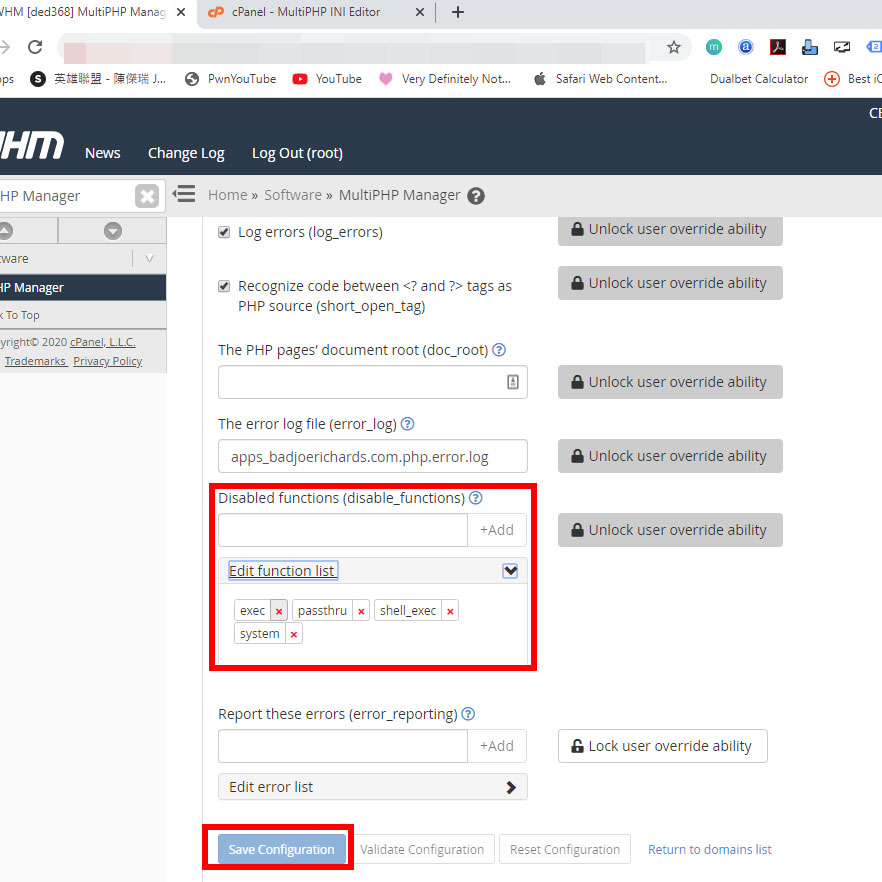
Scroll down and ‘Edit function list’ for Disabled functions (disable functions) field.
Delete the ‘exec’ item. And Save.

That’s it!
Make sure your index.php ENVIRONMENT is defined as ‘development’.
// in index.php, around line 58.

	define('ENVIRONMENT', isset($_SERVER['CI_ENV']) ? $_SERVER['CI_ENV'] : 'development');
	//define('ENVIRONMENT', 'production');
This will help to throw out error messages for your to debug the issues.
https://cmatskas.com/fixing-virtual-disk-errors-in-vmware/
If you have purchased or upgraded your cPanel license from the cPanel Store. Your license won’t be active by default and it would need to be refreshed.
Once you have payed for your cPanel license on the cPanel Store, open a SSH window (or WHM > Terminal) and type the following command under the root level:
/usr/local/cpanel/cpkeyclt
That’s it! The script will run and refresh your license status.
You may now enjoy your new cPanel license with more accounts or features.
Last updated: 20200216
The best tool to restore and get all your files from the lost/corrupted partition is: EaseUS Data Recovery Wizard.
Period. It’s so good I even paid US$149 for a lifetime of upgrades. (NOTE: it’s for 1 computer only it seems, had difficulty running the software on another computer with the same license)
Disclaimer: This is NOT a paid article. I’m not affiliated even. I just need good tools to get back important data files, as that’s part of my work.
And you can use the Free version of course, but after I saw the files that it can restore, I knew I should support this software.
I’ve personally spent US thousands of dollars on lost data, and hiring experts to restore damaged HDD drives.
There are about 4-5 other programs that I tried, and they are not even close. Some attempt to deep scan for 1 hour for my 256GB SSD drive, others can restore files but cannot get the names right.
Some can get files and names right, but it loses folder and path info, placing all files in 1 big folder – that’s really useless for me, my programs and work will not work.
Make sure you do not write or force a CHKDSK on your drive when you see partition failure or missing files. You don’t want to risk overwriting any files.
If you are trying out various programs to restore files, choose to restore files TO ANOTHER DRIVE. It is very important to restore to ANOTHER DRIVE.
So I have an SSD that suddenly started automatically running CHKDSK during a system restart.
And that was it, the files in the drive are no longer accessible and when accessing the drive from Windows File Explorer, it says:
X:\ is not accessible.
The disk structure is corrupted and unreadable.
Thank you so much Windows. So I had to research ways to fix it.
I must admit MiniTool Partition Wizard is a great software, if you want to copy, resize and upgrade your SSD or HDD drives. It is incredible for resizing! But when it came to data recovery, EaseUS Data Recovery Wizard is king.
MiniTool manage to list and restore all my files without their filenames.
Recuva managed to list and restore all my files, with their filenames, but without their folder structure -they were all in 1 large folder.
Stella took 1 hour and hung when trying to restore my SSD.
Let me know if my advice worked for you, or other tools you tried.
First, connect the hard drive to your Mac and make sure it shows up in the Finder’s sidebar. Copy something to the hard drive from the desktop just to make sure it works. If it doesn’t then it might not be formatted to use with a Mac (most external hard drives aren’t). If that’s the case, you’ll need to first reformat the hard drive to FAT format.
The first thing you need to do is connect your iPhone or iPad to your Mac using the USB to Lightning connector you got with your device.
Image Capture on Mac is one of the most underrated utilities. To launch it, search for “Image Capture” using Spotlight search (using Cmd + Space shortcut).

After you launch it, find your iOS device in the left sidebar and click on it.

You can either use the keyboard shortcut Cmd + A to select all or just individually check mark all the images you want to import.
By default, photos will be imported in the Pictures folder. Click the drop-down, and select “Other”.

Now select the folder in the external hard drive as a source.


Click the “Import” button and wait until the transfer is done. If the external hard drive is USB 2.0 spec, and you have a lot of photos, this could take more than just a couple of minutes.
You need to reinstall the game. Simple as that BUT!
Yes, make sure you DO NOT PAUSE or INTERRUPT the installation throughout the 120GB install from Blizzard Battle.net.
If you do, you risk facing these errors anywhere along the game when you play it later.
After installing Cumulative update for your Windows 10, your program cannot start with the error message:
XXXXXX can’t run on Windows
Check for an updated version of this app that runs on Windows.
Compatibility Assistant
Check for updates – Dismiss
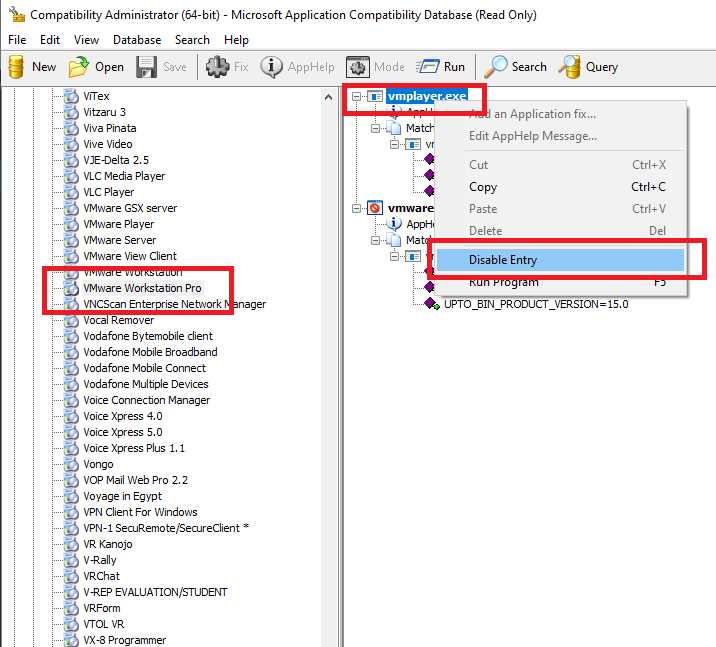
To bypass this problem and continue running the program:
