How to refresh your cPanel license after upgrading from cPanel Store?

If you have purchased or upgraded your cPanel license from the cPanel Store. Your license won’t be active by default and it would need to be refreshed.

Once you have payed for your cPanel license on the cPanel Store, open a SSH window (or WHM > Terminal) and type the following command under the root level:

/usr/local/cpanel/cpkeyclt

That’s it! The script will run and refresh your license status.

You may now enjoy your new cPanel license with more accounts or features.
How to solve SMTP emails not sending on your cPanel web server?

If you run a cPanel dedicated server, and your outgoing SMTP emails are sent from your PHP application code, but not delivering successfully, this could be due to configuration issue with your WHM / CSF firewall.

Even after you have added the outgoing ports 465, 567, and usual SMTP / TLS ports, you are still having this issue?

Then make sure you have checked your WHM > Tweak Settings > Restrict outgoing SMTP to root, exim, and mailman (FKA SMTP Tweak) . Turn that off.

When restarting your CSF firewall, you may also see the following message:

WARNING The option “WHM > Tweak Settings > Restrict outgoing SMTP to root, exim, and mailman (FKA SMTP Tweak)” is incompatible with this firewall. The option must be disabled in WHM and the SMTP_BLOCK alternative in csf used instead

How to solve Ethernet, wifi, internet not working and DNS_PROBE_FINISHED_BAD_CONFIG, DNS_PROBE_FINISHED_NXDOMAIN showing up in Chrome?

Problem

So you’re experiencing strange internet behavior, some websites stop working or connecting.

You’ve tried restarting your Wifi, router, computer. And then it works for about 30 seconds! Before websites stop working.. You are connected to your network, but there is just no stable internet.

You’ve even tried replacing LAN cables and different ports.

Chrome shows DNS_PROBE_FINISHED_BAD_CONFIG, DNS_PROBE_FINISHED_NXDOMAIN, when visiting websites.

Solution

If so.. give this a try:

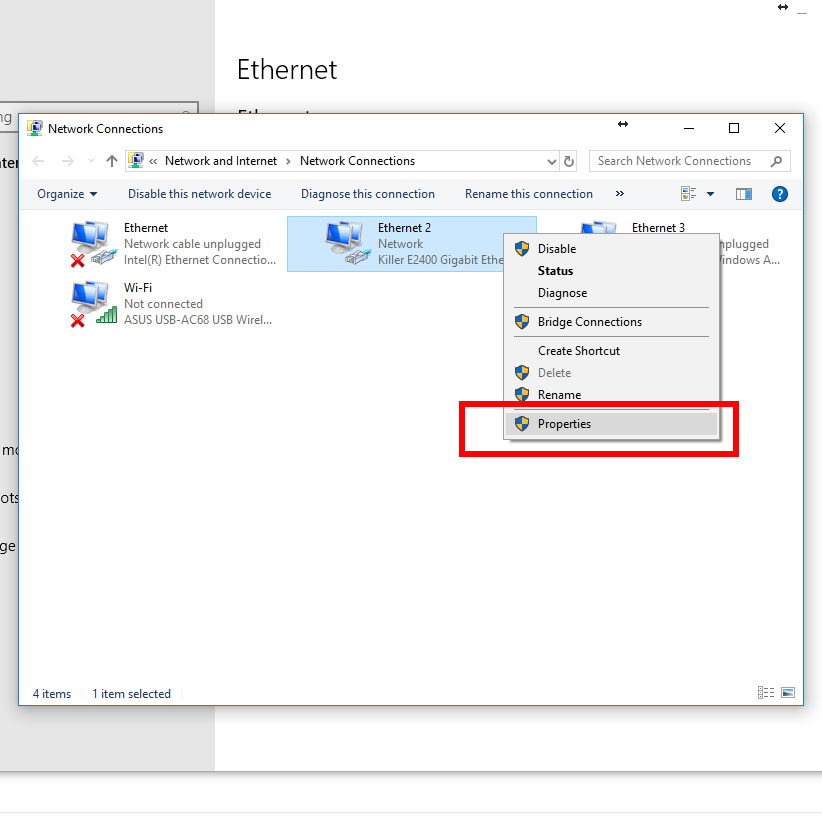
  1. Head to Properties window for your Network Adapter. (or Wifi)
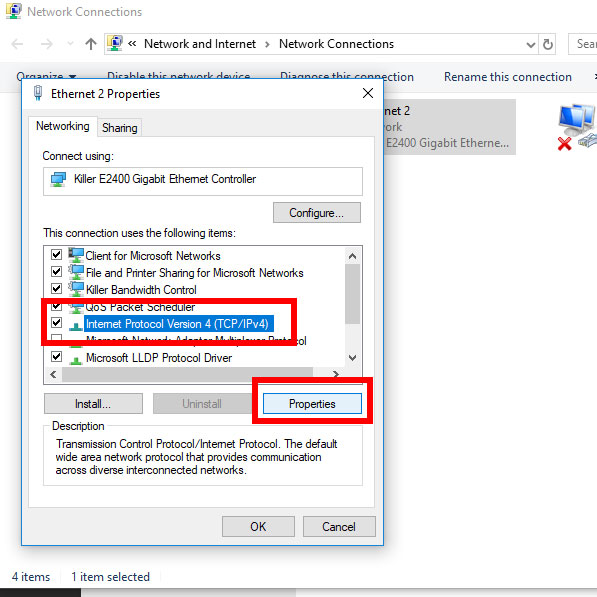
  2. Open TCP/IP properties. (Internet Protocol Version 4 TCP/IPv4)
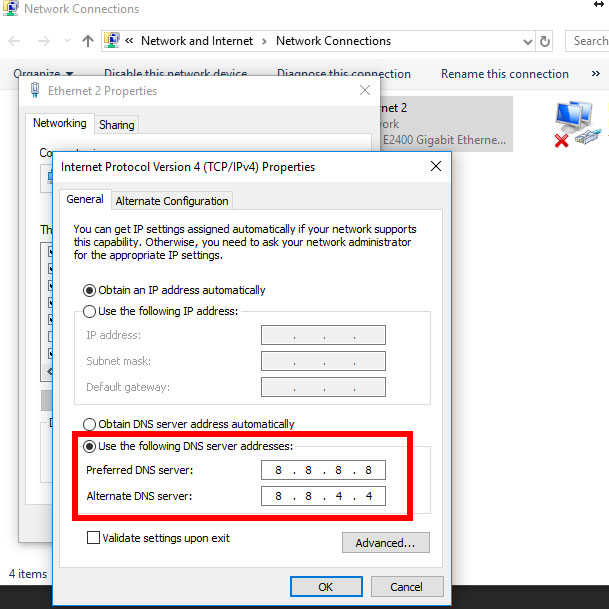
  3. Select “Use the following DNS server addresses” and fill in, 8.8.8.8 and 8.8.4.4 respectively. These are Public DNS servers from Google.

If it works, buy me a coffee:


Buy me a coffeeBuy me a coffee

or drop me a comment 🙂