How to sample slice move and glide any sample in Cubase 11?
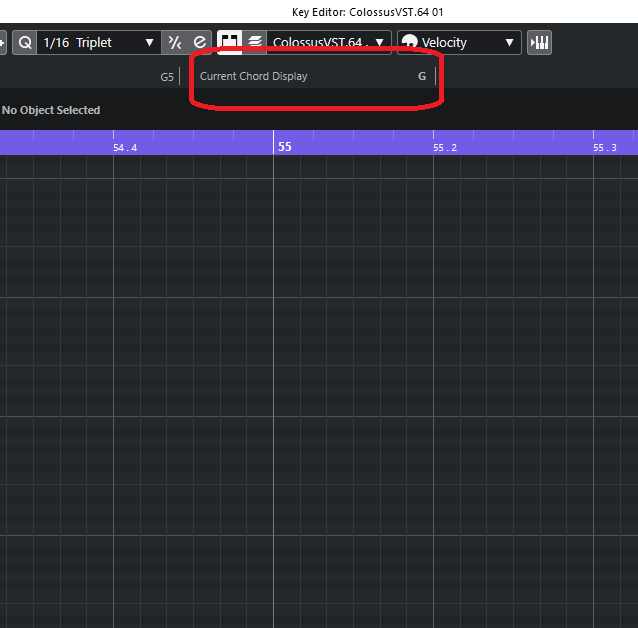
How to show/display chord in Key editor in Cubase?
Last updated: 20201108
- In the Key Editor / Midi Editor window, look for the Window Layout button and click on it.
2. Now enable the “Status Line” checkbox.
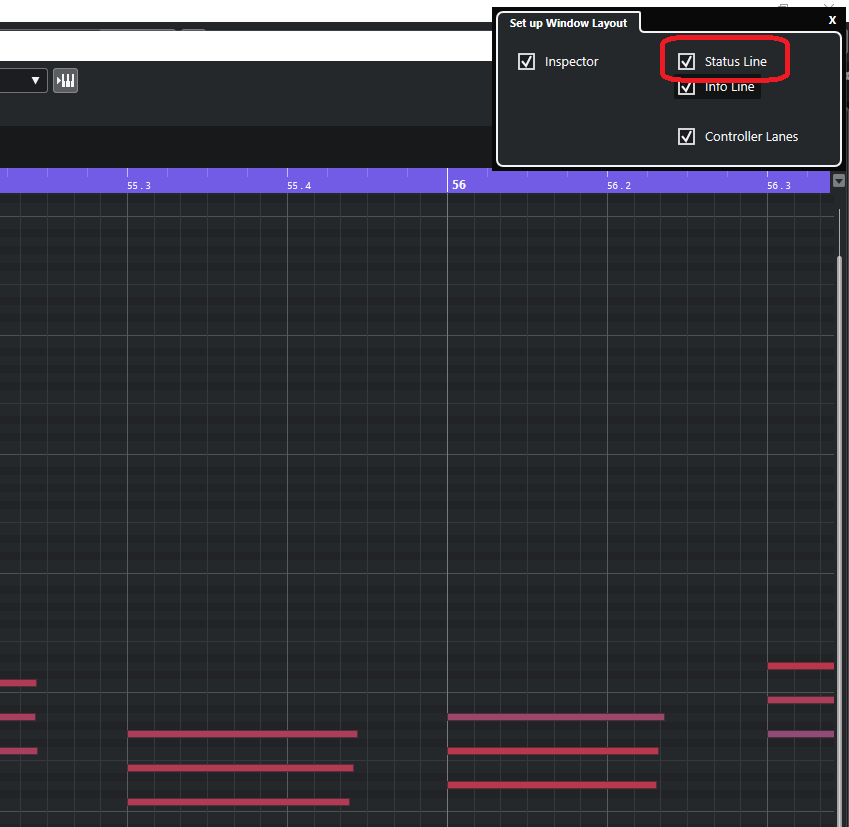
3. Enjoy the “Current Chord Display” information.
Reference:
https://www.steinberg.net/forums/viewtopic.php?t=18369
How to change accoustic guitar strings?
Summary:
- Lay guitar flat on bed, with headstock on LEFT, body on RIGHT.
- Change 2 strings at a time to keep the guitar tension.
2. Start with the LOWER E and A.
3. Cut the string with a distance of 1 and a half knobs away from the inserting knob.
3. Insert through the HOLE from the inside of the stock and leave only a little outside.
4. Wind and let the string start from TOP, and wind to BOTTOM, so the strings overlap nicely from TOP to BOTTOM. For the LOWER 3 strings, WIND towards LEFT side, which is ANTI-CLOCKWISE. For the other 3 strings (high E B G), wind towards GUITAR BODY.
5. for the LOWER 3 knobs, wind
http://sites.psu.edu/tdr5114/wp-content/uploads/sites/16384/2014/09/Instructions.pdf
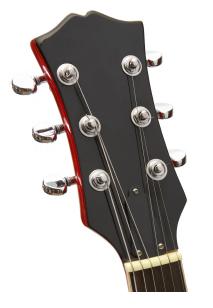
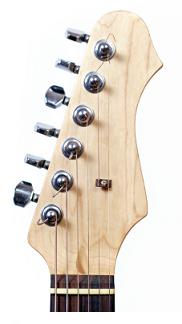
Which string to which fret knob on a guitar?
Just look at this headstock images, you should be able to figure!
What are the common shortcuts for ProTools vs Cubase on Windows?
See Google Drive sheet:
https://docs.google.com/spreadsheets/d/12pIsclImY1jf48NslP_0yKGUTx_QnlP3InJiCa6L6Aw/edit?usp=sharing
How to mix vocals a quick guide?
https://cymatics.fm/blogs/production/how-to-eq-vocals#:~:text=Some%20of%20the%20most%20important,the%20vocal%20sound%20%E2%80%9Cboxy%E2%80%9D.
How to map a fader or knob on Remote SL to Waves EQ vst in Cubase 10?
Last updated: 2020/08/16
First, run your “Automap Server ” software from your Windows search/start menu.
- Then select “Software Setup”.
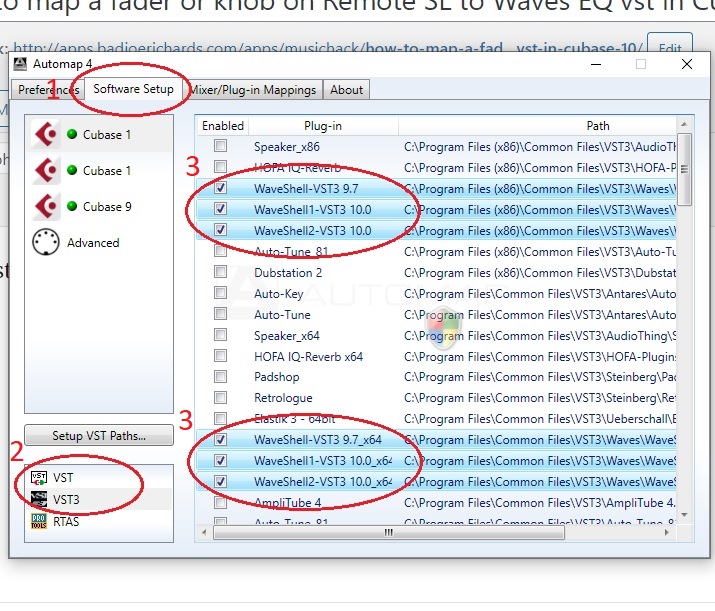
2. Select “VST”
3. Enable ALL instances of “WaveShell-VST3 9.7”, “WaveShell-VST3 10.0” or similar that you can find.
4. Do it for both “VST” and “VST3” selections from the bottom (As seen in 2 in image)
Now launch Cubase, and load an Empty Project.
Add a new Audio track.
Insert “Q1 Stereo” for example.
Your Remote SL hardware should automatically display and map the controls.
You can further add new faders/knobs for controlling by selecting:
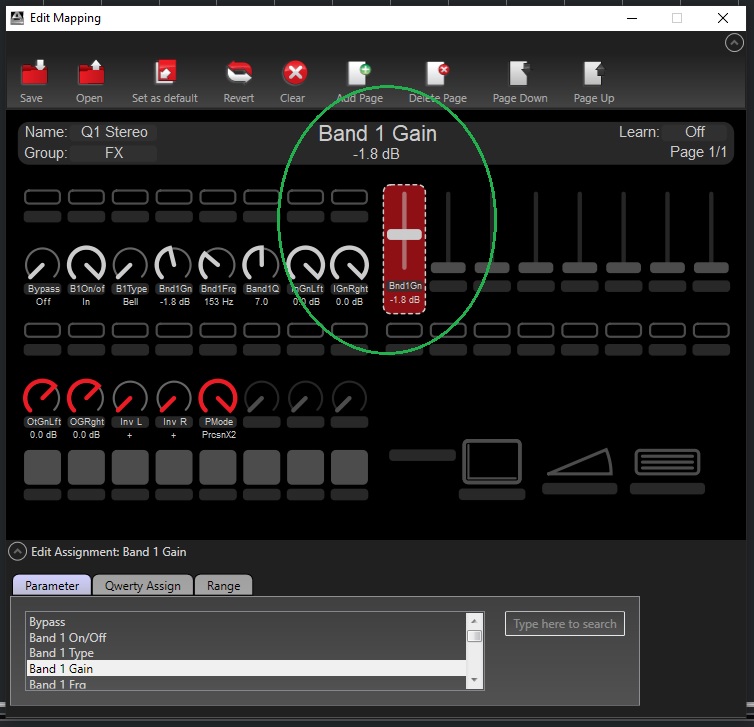
- Selecting “Mixer/Plug-in Mappings”
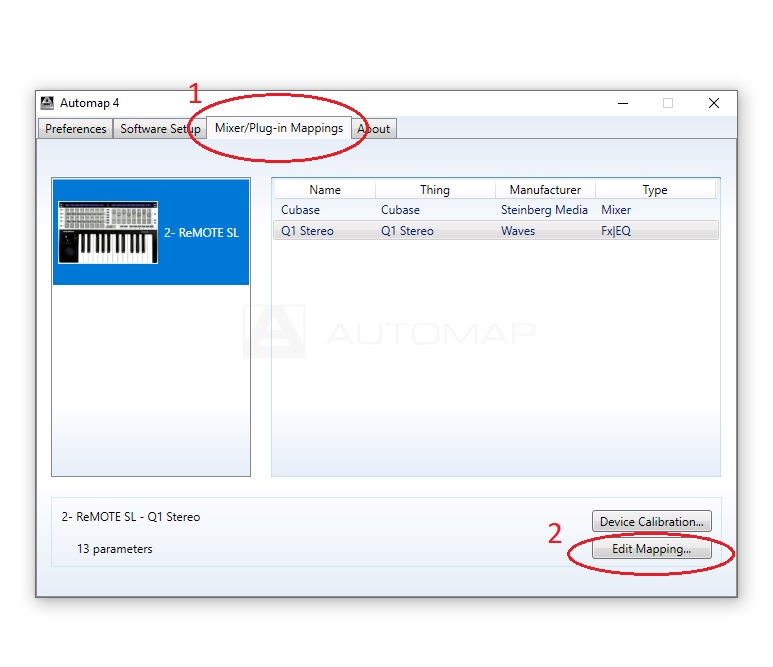
2. Select an empty fader or knob you want to use.
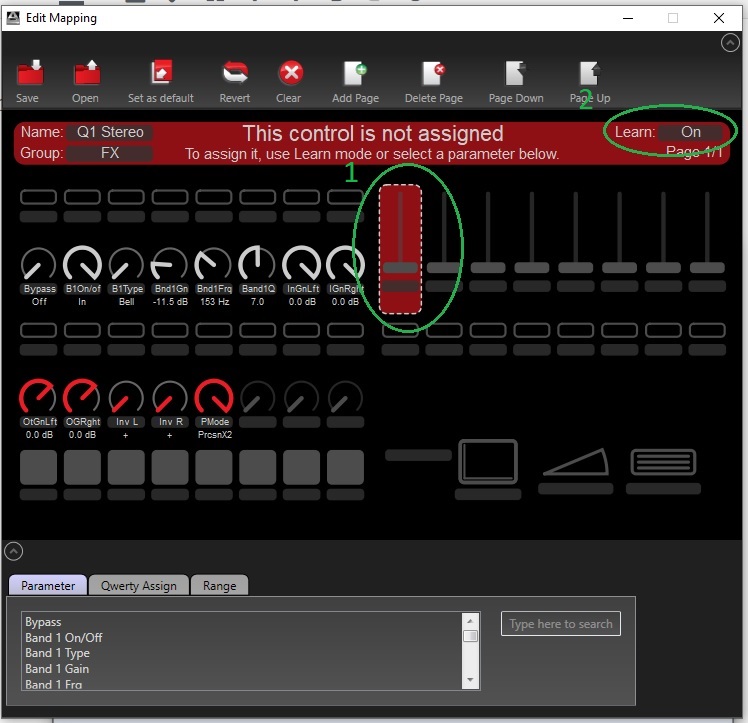
3. Then turn on Learn Mode as seen in Green Step 2 in image above.
4. Now head back to Cubase and adjust the value/knob in Q1-Stereo that you want to change with the empty Fader/Knob from Step 2 above.

5. That’s it! You should see the fader/knob is now assigned and can change your plugin value on the fly.
Happy automating!
How to add markers in Cubase (other than just using the Timeline)?
Summary:
- Right click on Project, and Add Marker Track.
- Alt+Click anywhere in the track to add markers.
How remove vocals from song? or isolate vocals?
KnockOut VST – https://blog.wavosaur.com/extract-vocals-from-song-with-kn0ck0ut-vst/
stored in Netflix tonight soundtrack folder.
http://vocalremover.codeplex.com/
Not bad.