Time required: ~3 hours.
- Flip and place your keyboard on a soft surface, so the bottom of the flipped keys are facing you. i.e. carpet, bed, piano seat.
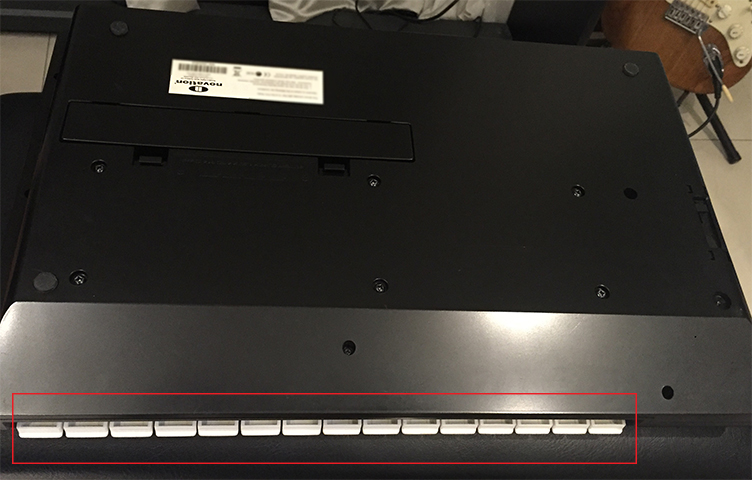
Flipped remote SL keyboard - There are 2 layers/sets of screws. One inner layer (green) on the flat bottom surface, where your Novation serial sticker is, and one outer layer (orange), where you grip the keyboard when flipping it over. There are 2 hidden screws (red circles), 1 in the battery compartment, the other in a deeper slot. Start removing ALL the screws (turn anti-clockwise), starting from the outer layer (orange), bottom left with a standard screwdriver. Place the removed screws in the same positions on a flat surface, so you can remember which screw was for which slot.
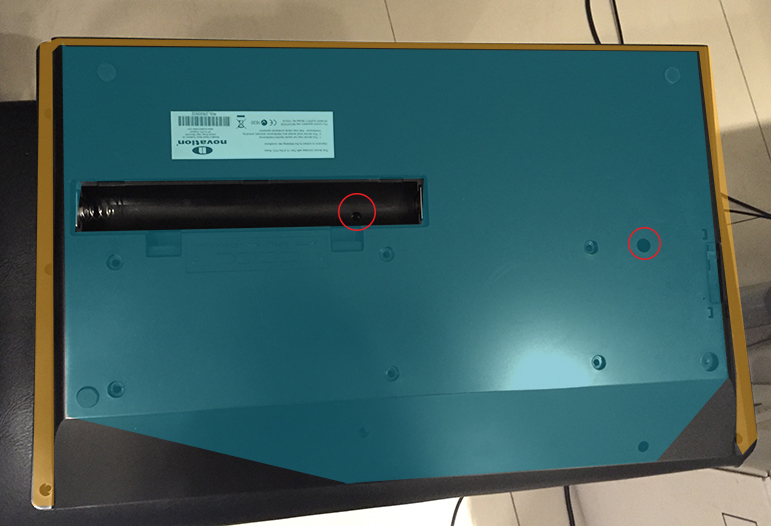
Remote SL keyboard screws layer, showing layers and hidden screws. - Once you have all screws unscrewed, flip the keyboard backover so it’s standing normally – before lifting the top panel (orange) where all the knobs are.
- Carefully detach the bus cable (red circle), connecting the top panel and knobs, to the keyboard’s chipset.
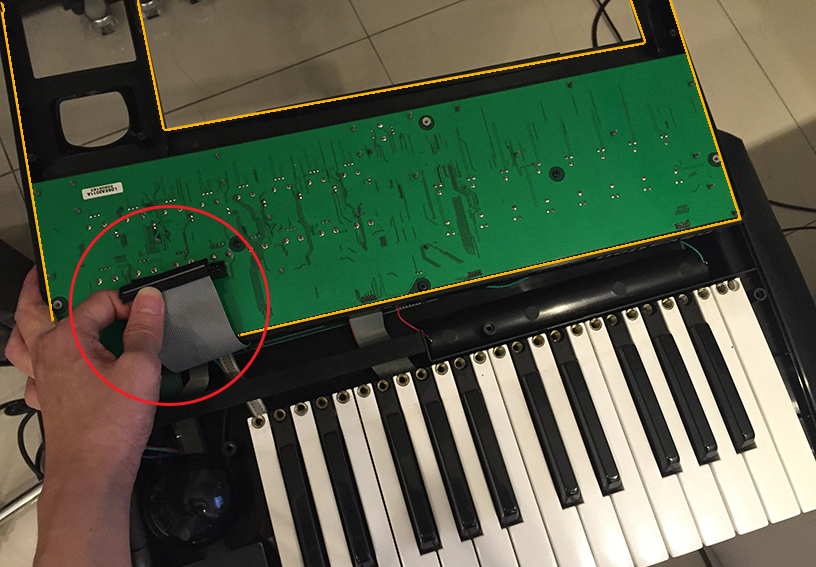
Remote SL top panel with bus cable (red circle) - Now place the detached panel on a flat surface, so the green chipboard is facing you. Now take off the 2 screws attaching the green chipboard to the panel.
- Next flip it back normally again, so the knobs and button are facing you. Carefully pluck all the knobs and faders off. Take note of which row of knobs belong at the top or bottom, and how they look. Arrange them nicely out on your surface so you can keep track.
- Now you may detach the panel from the chipboard easily and start your dusting and cleaning. The top panel plastic should be easy to clean with a cloth, earbuds, and air dust sprayer. While the chipboard is slightly trickier. Make sure you only uses your air dust sprayer, and earbuds when cleaning the chip – no liquids!
- Re-assemble the top panel and its chipboard by reversing the last few steps 7,6,5. Put the top panel aside, time to work on the keyboard.
- Carefully lift the piano keys from the body, and carefully detach the 2 cables.
- Flip and lay it on a flat surface, and start unscrewing. As usual, carefully place the screws so you remember where each screw should go. Notice the orange port is closer to the white keys, in the middle. This will help you later when re-assembling.